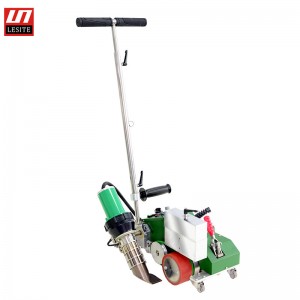
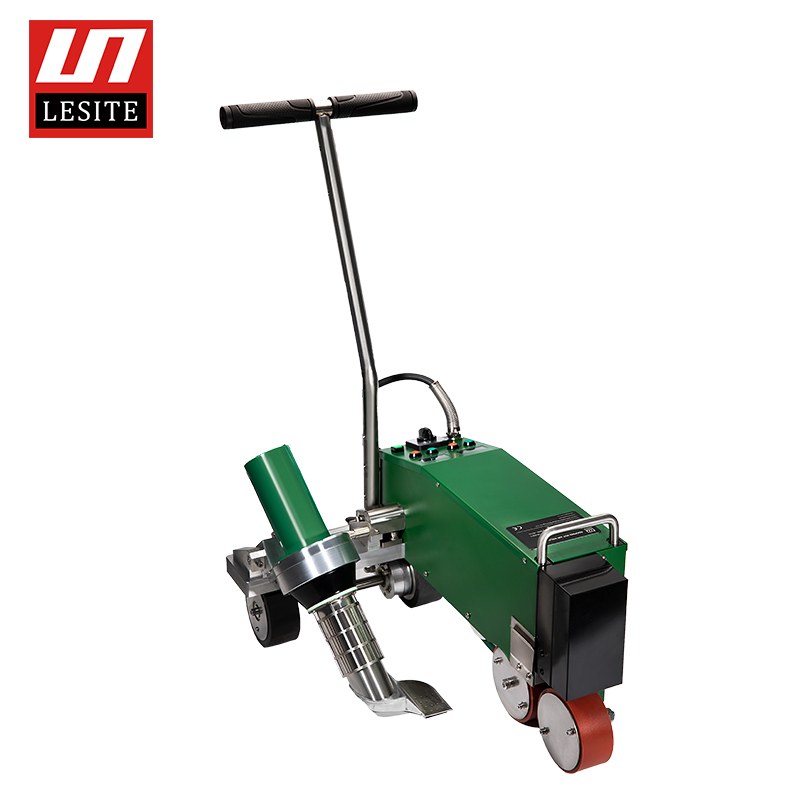
LST-WP1 description
application
LST-WP1 roof hot air welding machine has advanced heating technology and high welding pressure. With powerful functions, stable performance and convenient operation, it is suitable for the construction of polymer waterproof membranes such as PVC, TPO, EPDM, CPE, etc.
Precautions
The main components

Before disassembling the welding machine, please make sure that the machine is turned off and unplug it to avoid being injured by the live wires or parts inside the machine.

The welding machine generates high temperature and high heat. Improper use may cause fire or explosion, especially when it is near combustibles or explosive gases.

Please do not touch the air duct and nozzle (during the welding process or when the welding machine has not completely cooled down), and do not face the nozzle to avoid burns.

The power supply voltage must match the rated voltage (230V) marked on the welding machine and be grounded reliably. Connect the welding machine to a socket with a protective ground wire.

In order to ensure the safety of the operators and the reliable operation of the equipment, the power supply at the construction site must be equipped with a stabilized power supply and a leakage protector.

The welding machine must be operated under the correct control of the operator, otherwise it will cause burning or explosion due to high temperature

It is strictly forbidden to use the welder in water or on muddy ground to avoid immersion, rain or moisture.

control Panel
Positioning before welding

1. Welding temperature:
Use bottom Precaution 11 Set the required temperature. You can set the temperature according to the welding material and the ambient temperature. The LCD screen will display the set temperature and the current temperature.
2. Welding speed:
According to the soldering temperature, use the bottom Precaution 12 set the desired speed.
The LCD display will show the set speed and current speed.
● This machine has a parameter memory function, that is, when the welding machine is used next time, the welding machine will automatically use the parameters set last time without resetting the parameters.

1. Press the handle to lift the machine and move it to the welding position (the edge of the upper film should be aligned with the driving roller), as shown in Figure 4.
2. Lift the guide rod to make the front wheel (left) off the ground, slide the handle of the guide wheel to the right, until the guide wheel limit slot plate is in the correct position, so that the guide wheel is aligned with the edge of the upper film.
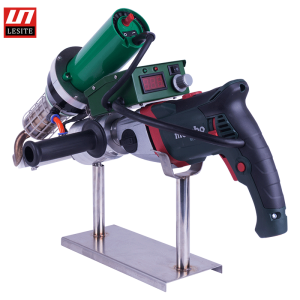
Welding Nozzle Setting
Nameplate

The model identification and serial number identification are marked on the nameplate of the selected machine.
Please provide these data when consulting Lesite Sales and Service Center.

| error code | Description | Measures |
| Error T002 | No thermocouple detected | a. Check the thermocouple connection, b. Replace the thermocouple |
| Error S002 | No heating element detected | a. Check the heating element connection, b. Replace the heating element |
| Error S002 | Thermocouple operation failure | a. Check the thermocouple connection, b. Replace the thermocouple |
| Error Fanerr | overheat | a. Check the hot air blower, clean the nozzle and filter |
Boot Steps
Daily Maintenance

① Turn on, the LCD screen is as shown in the figure above. At this time, the fan does not generate heat and is in a state of natural blowing.

② Press the temperature rise (32) and temperature drop (33) buttons at the same time. At this time, the blower begins to heat to the set temperature.
When the current temperature reaches the set temperature, press the speed button.
Ascend (34) to set the speed. The LCD screen is shown in the picture above.

③ Pull up the blower positioning handle (30), raise the hot blower (8), lower the welding nozzle (3) to make it close to the lower film, move the blower to the left, insert the welding nozzle into the film, and perform welding
The nozzle is in place, and at this time, the welding machine travels automatically for welding.
The LCD screen is shown in the picture above.
④ Always pay attention to the position of the guide wheel (21). If the position is deviated, you can touch the operating handle (25) to adjust.
Shutdown steps
After the welding work is completed, remove the welding tip and return to the initial position, and at the same time press the temperature rise (32) and temperature drop (33) buttons on the control panel to turn off the heating. at this time,
The hot air blower stops heating and is in cold air standby state. After the temperature drops to 60°C, allow the welding gun to cool down to °C, and then turn off the power switch.